Jenkins is an open source Continuous Integration tool written in Java with plugins built to fasten deployment cycle by continuous testing.
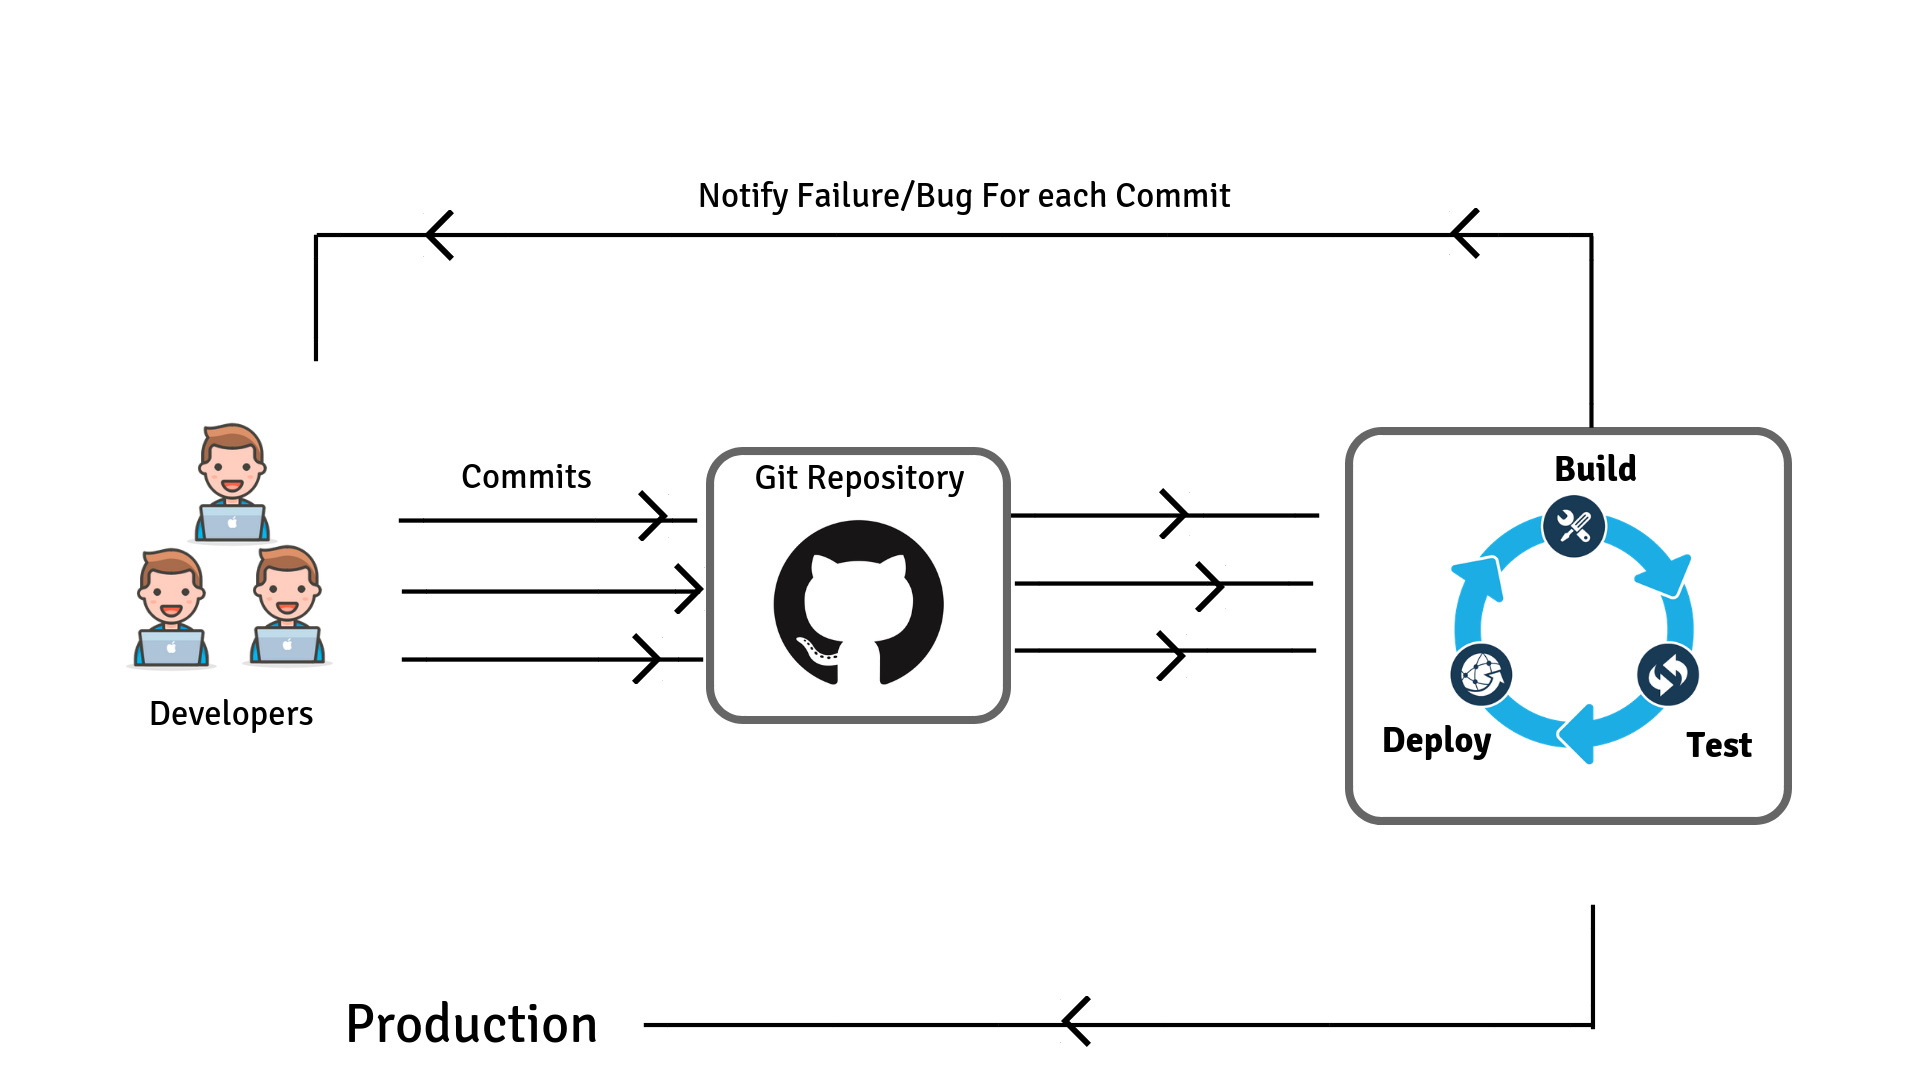
Workflow of Continuous Integration with Jenkins
The below snapshot shows the workflow of continuous integration with Jenkins.
Creating Simple Jenkins job with Github
For Jenkins Installation and Setup refer Jenkins documentation.
Before creating a Jenkins job I have created a Git repository and added a sample file to it. Here is my sample file (example.java).

The snapshot shows the sample repository.

Step 1: Click on ‘New Item’ to create a new Jenkins job.

Step 2: Enter the name of Jenkins job, Choose ‘Freestyle Project’ and Click ‘OK’.

Step 3: Enter Job Description if necessary(Optional).
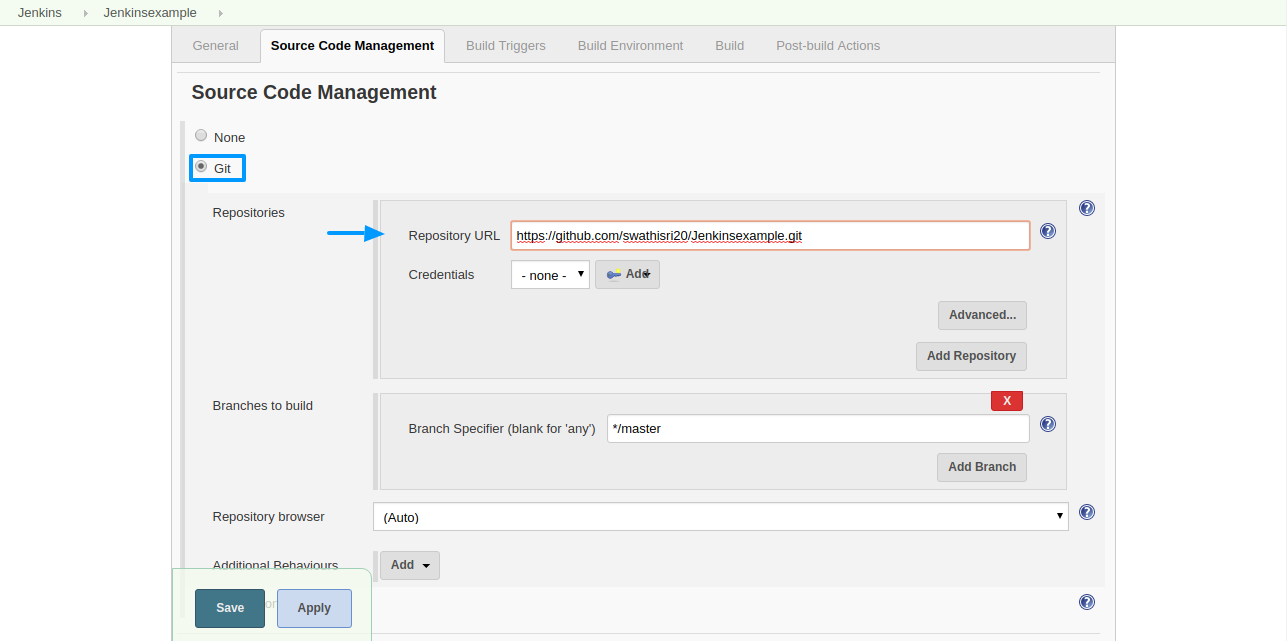
Step 4: Select Source Code Management as ‘Git’ and paste the Repository URL of your Git repository.
Step 5: Under Build Triggers select ‘Poll SCM’ and define the schedule for the trigger.
Note: Here schedule is given as ‘* * * * *’ which means to schedule trigger for every minute. To know more about the schedule description click help.
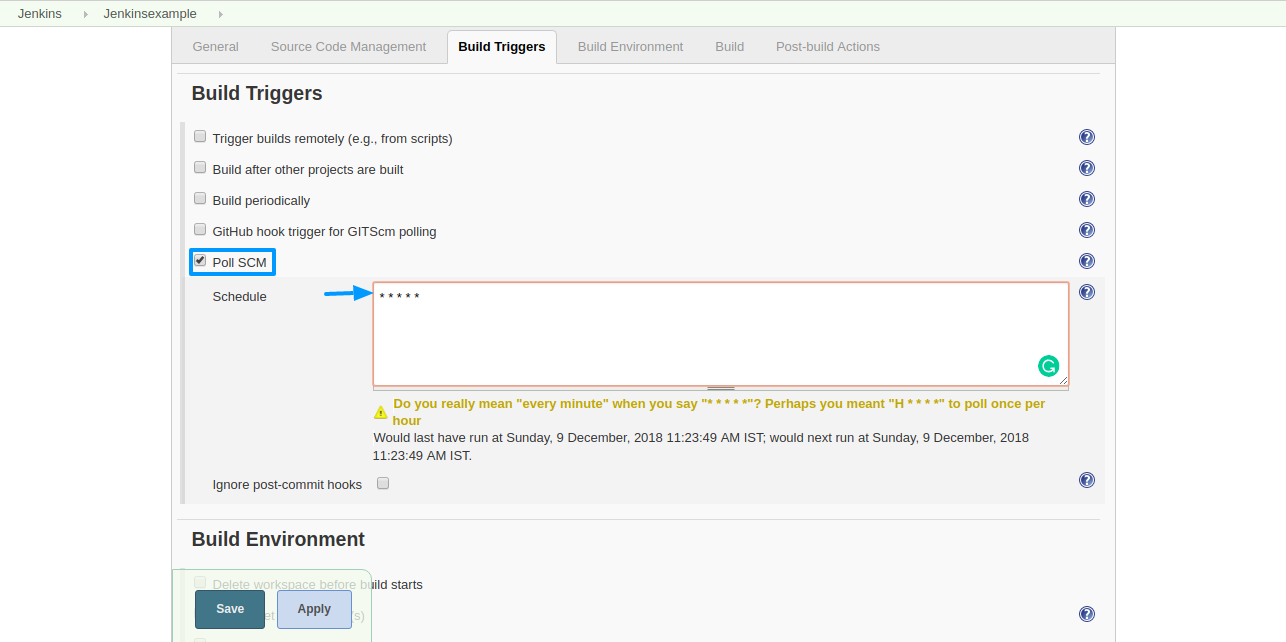
Now the Job checks Git repository once every minute for changes and triggers Build if any changes made in the Git repository.
Step 6: Under Build, Choose ‘Execute Windows batch command’ if you were running Jenkins in windows environment (or) Choose ‘Execute shell’ if you were running Jenkins in Linux environment.
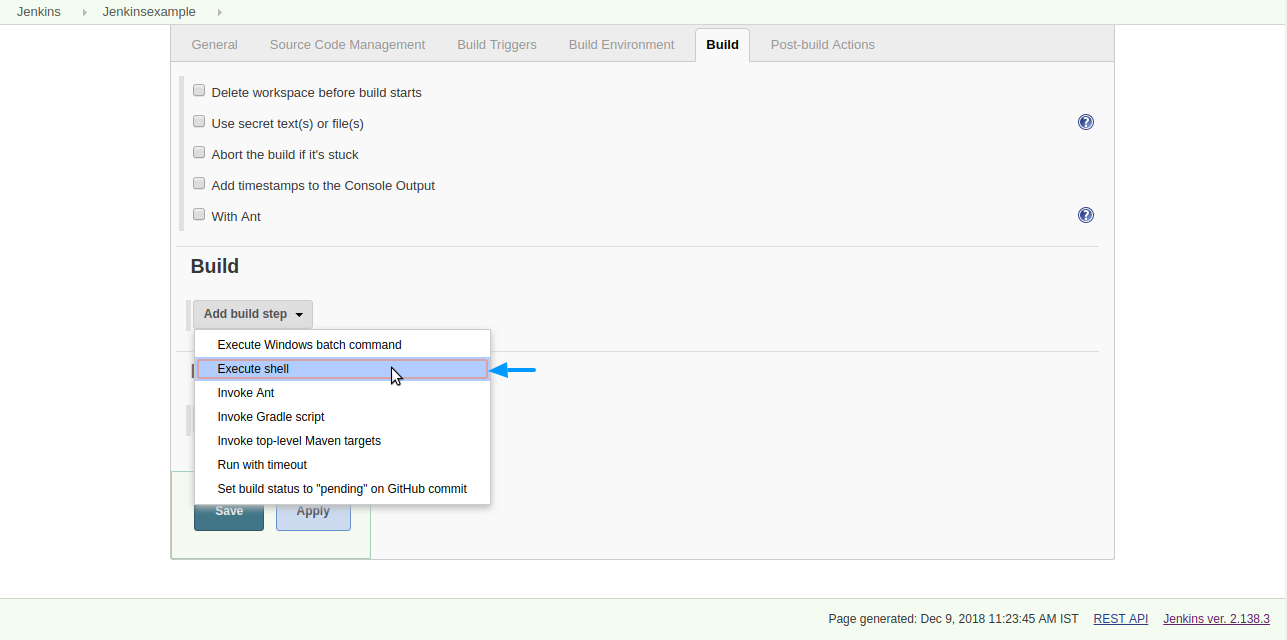
Step 7: Enter the commands for the build and click save.
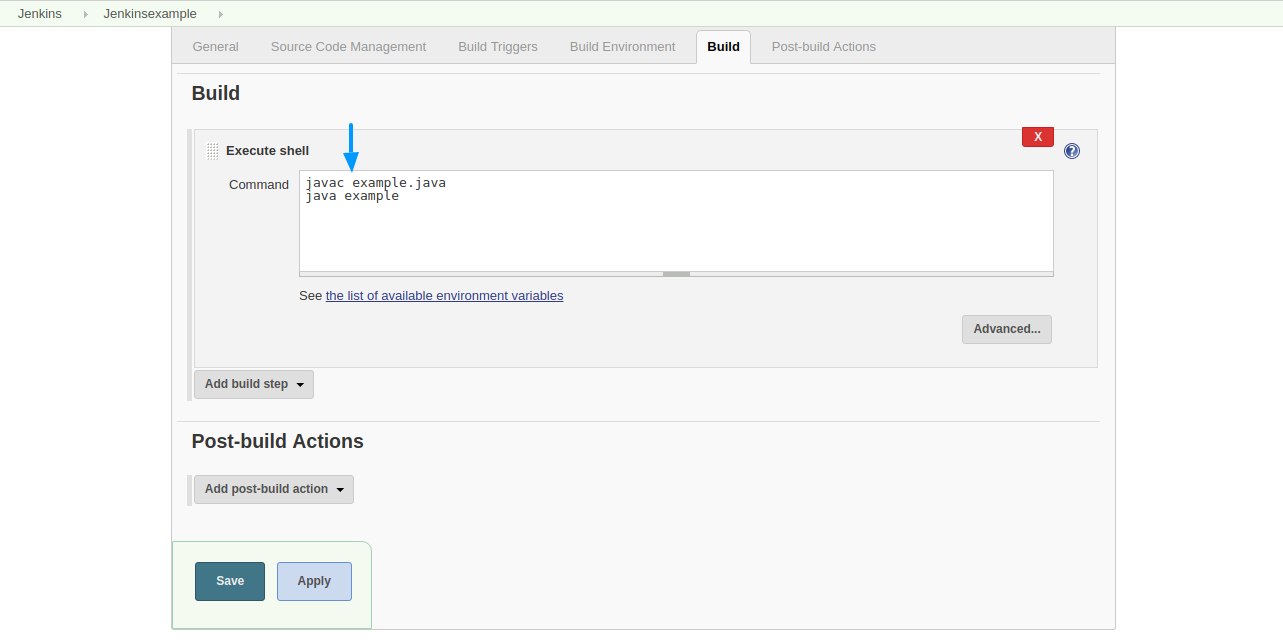
The Jenkins project is created now.
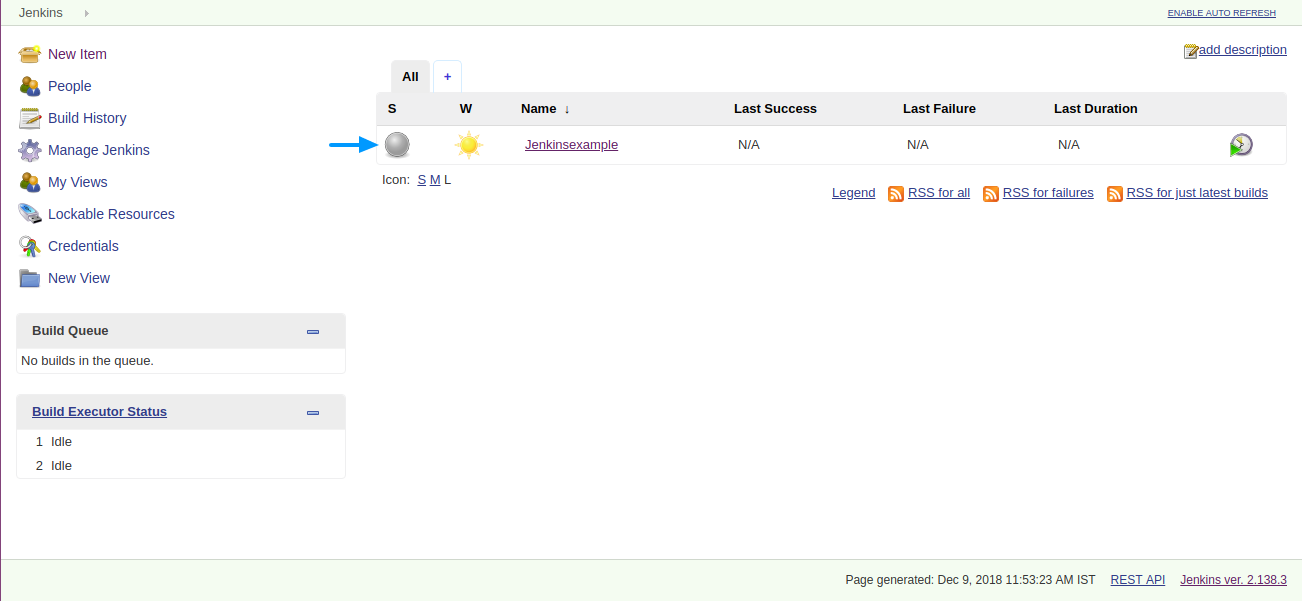
Continuous Testing Using Jenkins
When code committed into the repository. Here ‘example.java’ file is changed and committed.

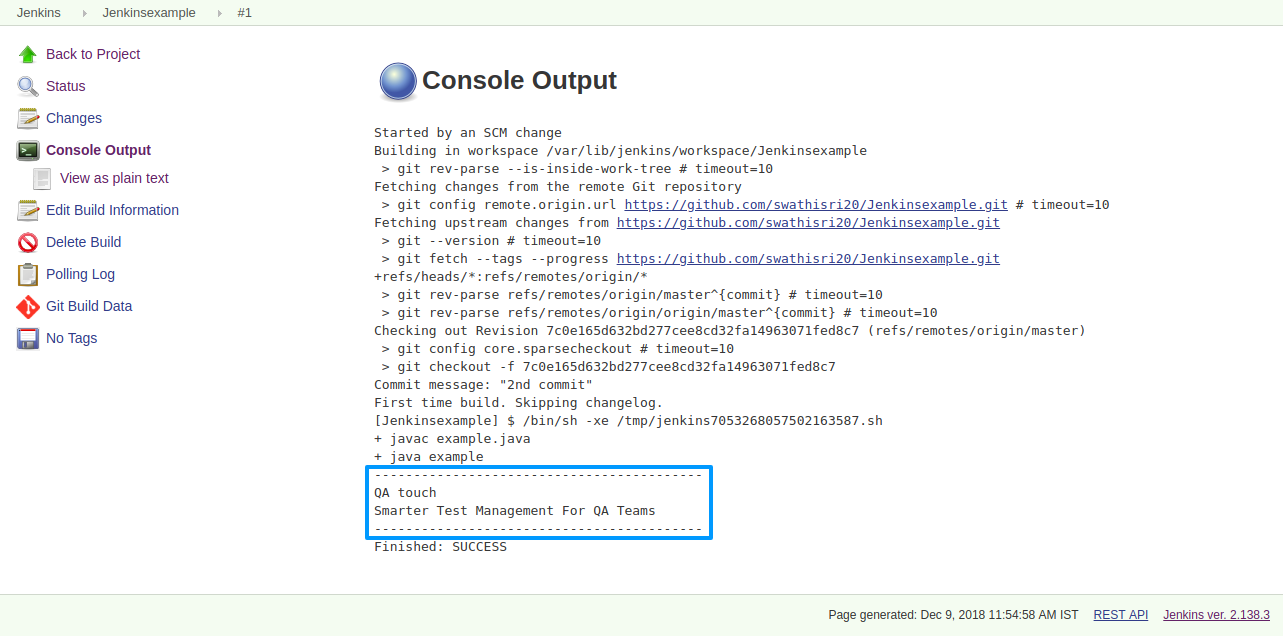
Jenkins Build automatically triggered on code commit.
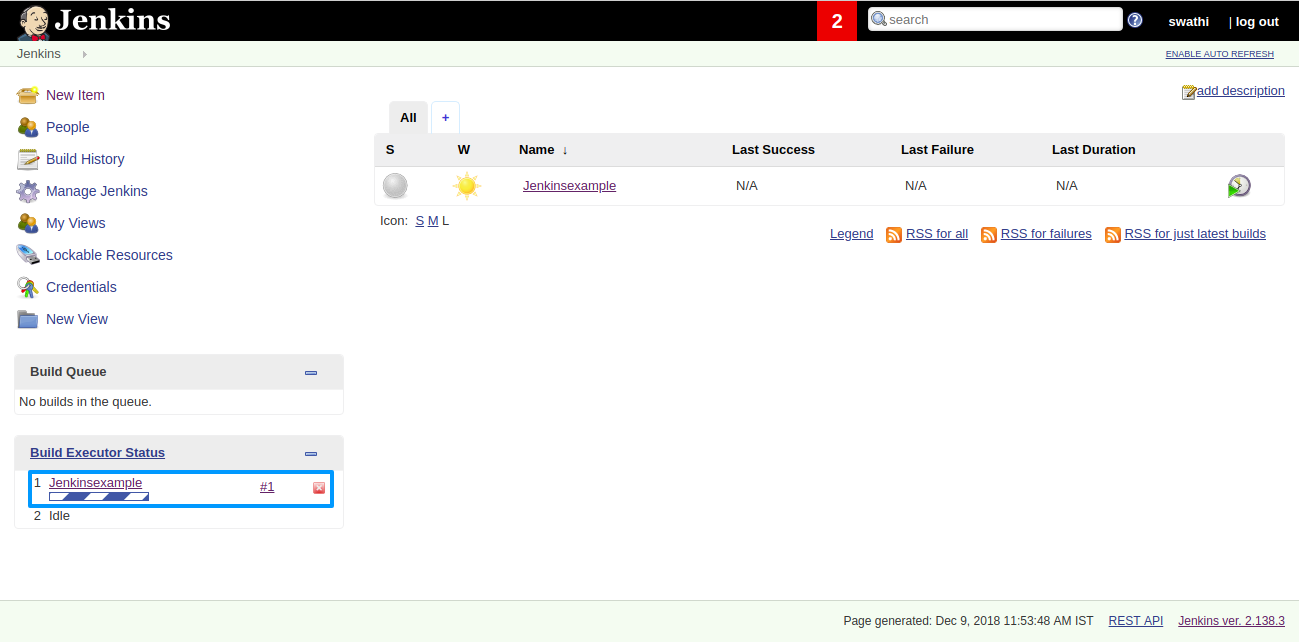
The output is displayed on the console output like below.
Hope this blog serves as a good feed for your technology cravings. Bags of interesting stuff are down the pipeline and do stay subscribed to get notified about those.
References


