The day is finally here. After months of undeterred work, we are pleased to announce to our community that QA Touch is now integrated with ClickUp.
ClickUp is a project management software with features including tasks, whiteboards, spreadsheets, and document collaboration on a unified platform
QA Touch offers seamless integration with ClickUp, presenting the best way to keep all the bugs posted in ClickUp. We have a plethora of other integrations like YouTrack, GitHub, GitLab, Bitbucket, and Trello.
ClickUp can be blended with QA Touch instantly, by following the four steps below:
How to Create a New App in ClickUp
- Generate Code & Map Workspaces after entering Client ID & Client Secret
- After selecting Teams and copying the Access Code, Paste the Access Code and Click Submit
- ClickUp QA Touch Global Configuration.
- Mapping ClickUp Project To QA Touch Project.
ClickUp QA Touch Global Configuration
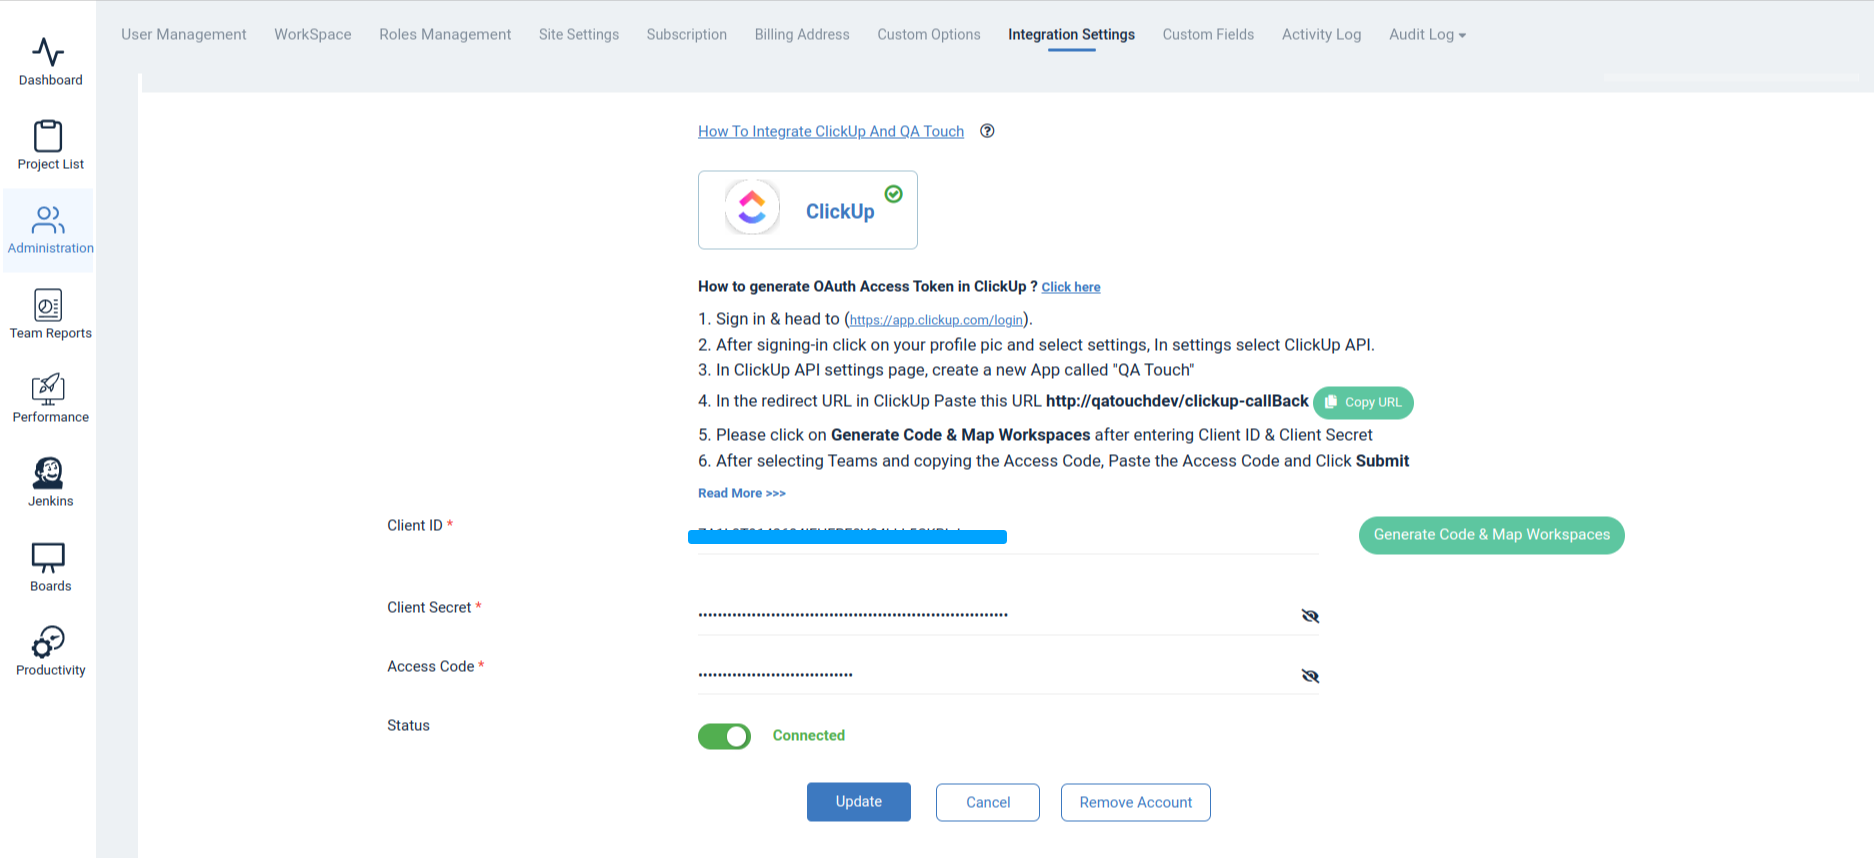
This settings configuration can be done by reaching out to the integration page. To reach the Integration page, go to Administration in the left navigation panel and click Integration Settings.
After logged in Administration -> Integration Settings -> ClickUp Tab
How to Create a New App in ClickUp?
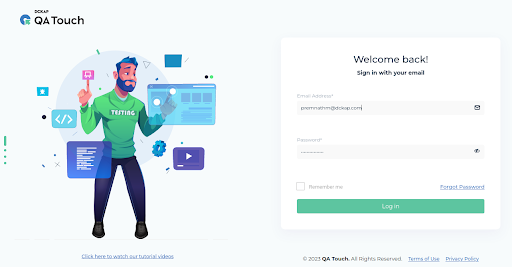
- Go to ClickUp Login and sign-in to your account (https://app.clickup.com/login).
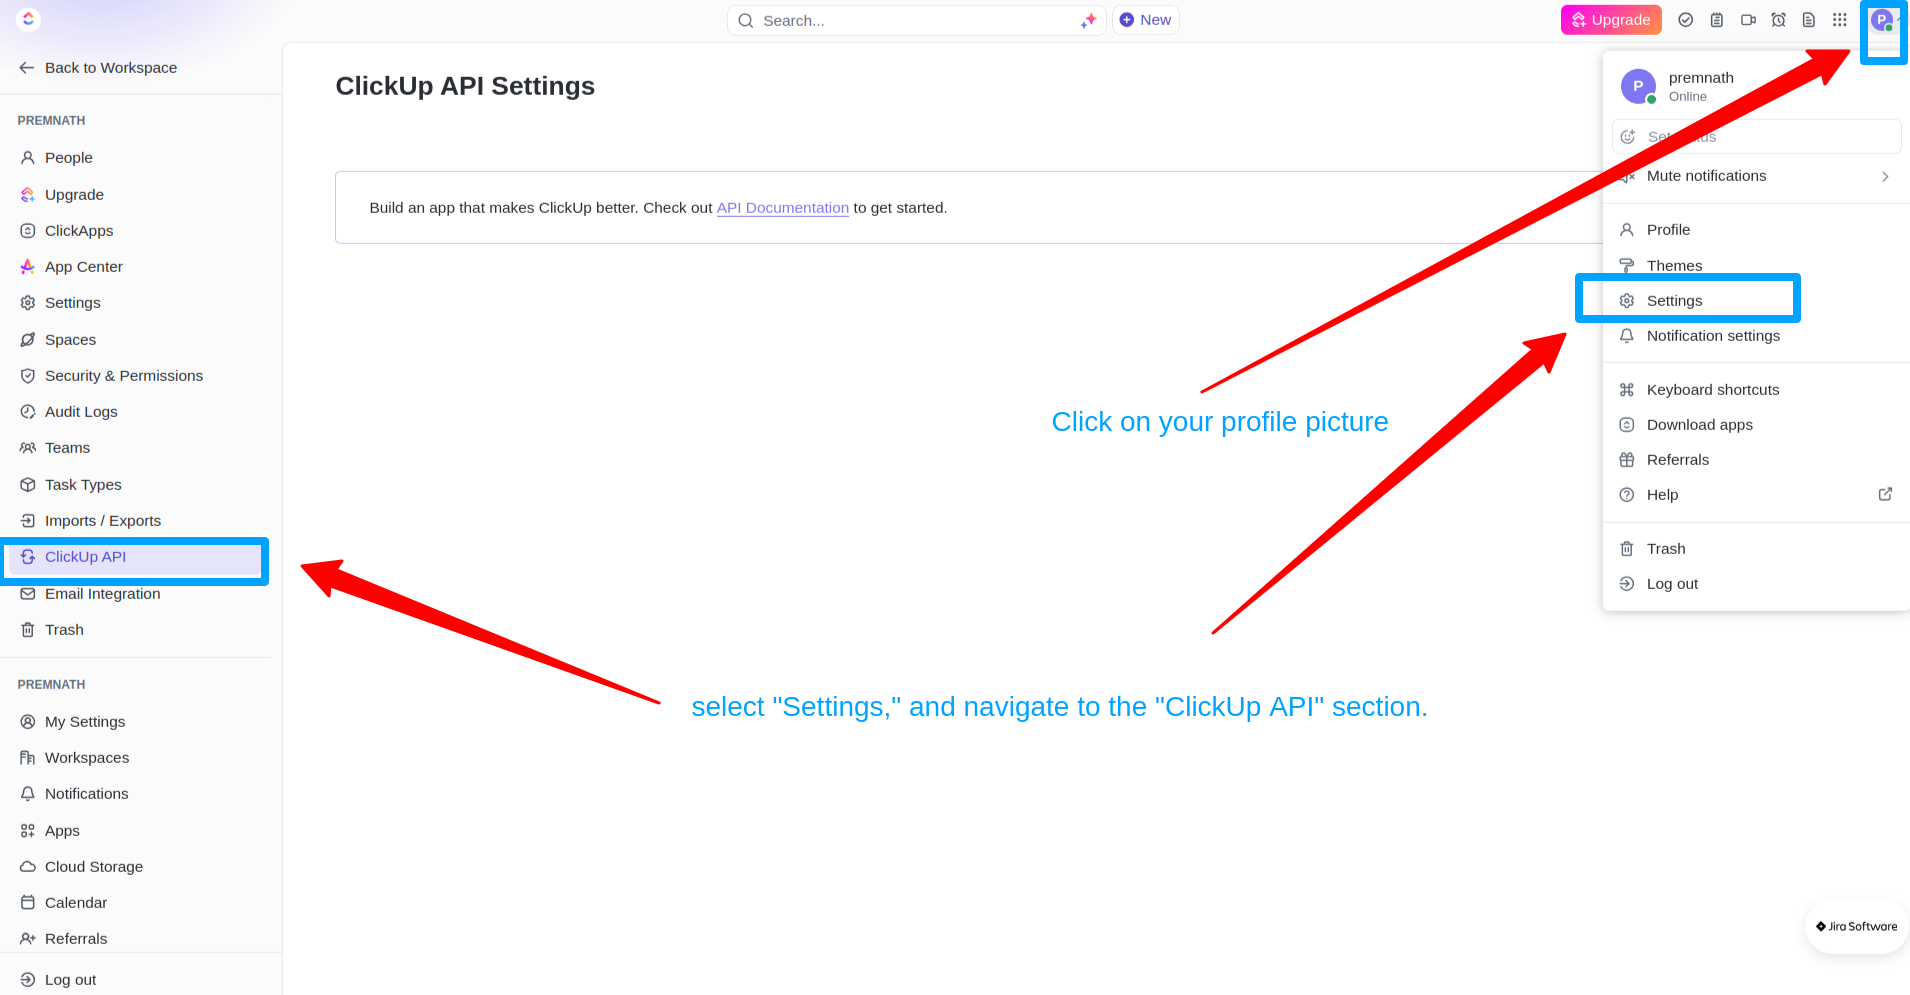
- After signing-in click on your profile pic and select settings, In settings select ClickUp API.
- ClickUp API settings, create a new app by clicking the “Create New App” button. Name the app “QA Touch” or any name
- In the redirect URL field, enter the url which can be copied from Integration Setting > Click Up Tab
(For example : http://yourdomainname.qatouch.com/clickup-callBack)
 Generate Code & Map Workspaces
Please click on Generate Code & Map Workspaces after entering Client ID & Client Secret,
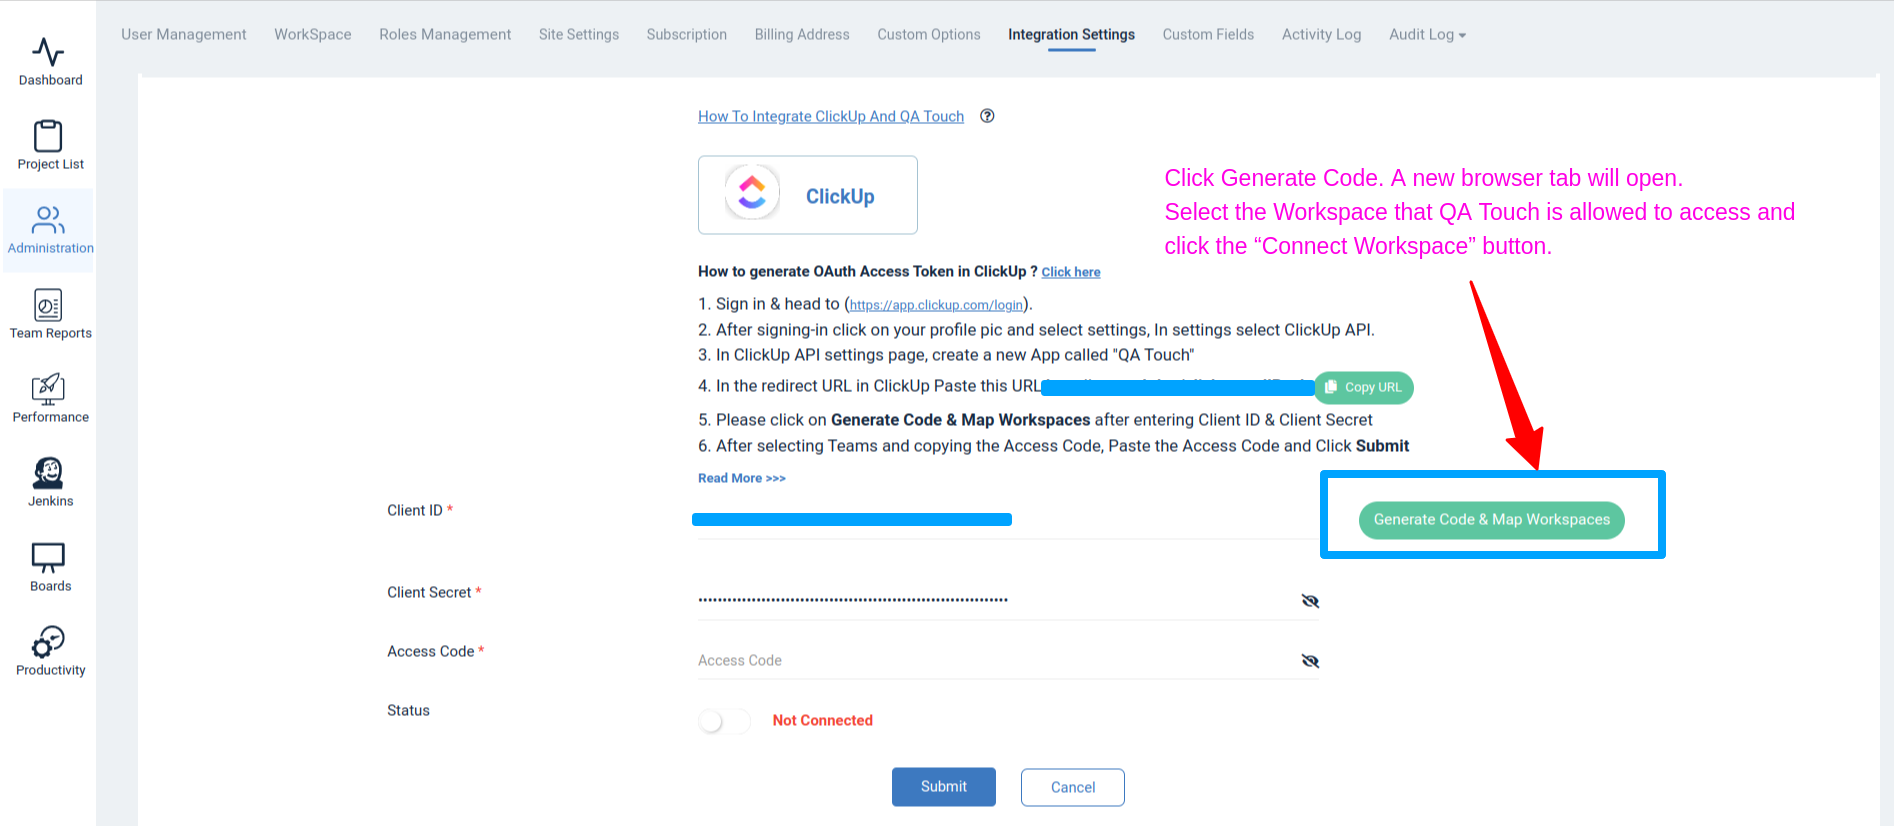
A new browser tab will open. Select the Workspaces that QA Touch is allowed to access and click the “Connect Workspaces” button.
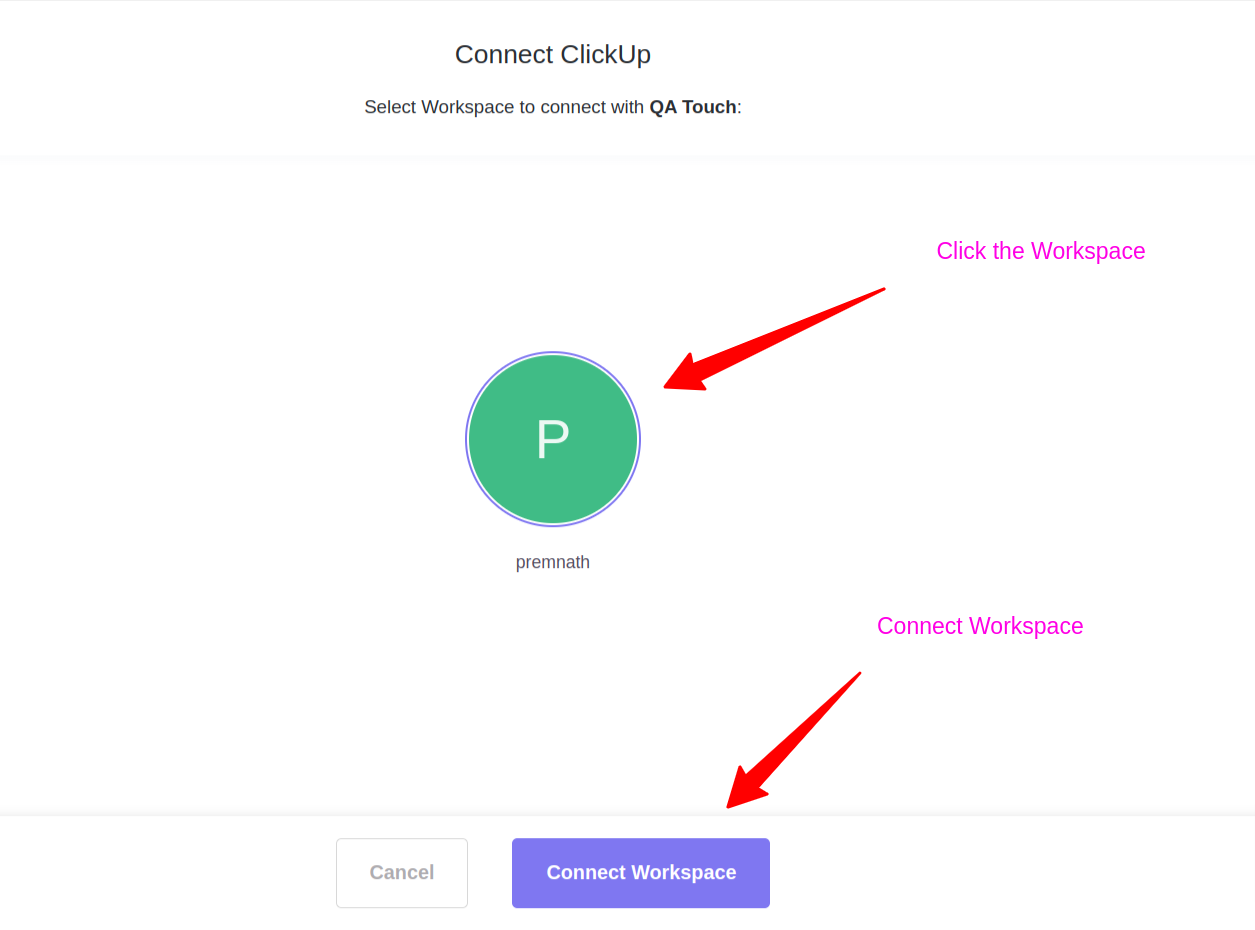

You will be redirected to a new page displaying the Access Code. Copy this code.
Return to the QA Touch screen, paste the Access Code in the designated field, and click “Submit.”
 ClickUp Global Configuration – Successful
Here’s the step-by-step guide one should be following for a successful and seamless Clickup integration with QA Touch:
- Login to QA Touch as an Administrator
- Click the Administration → Integration Settings
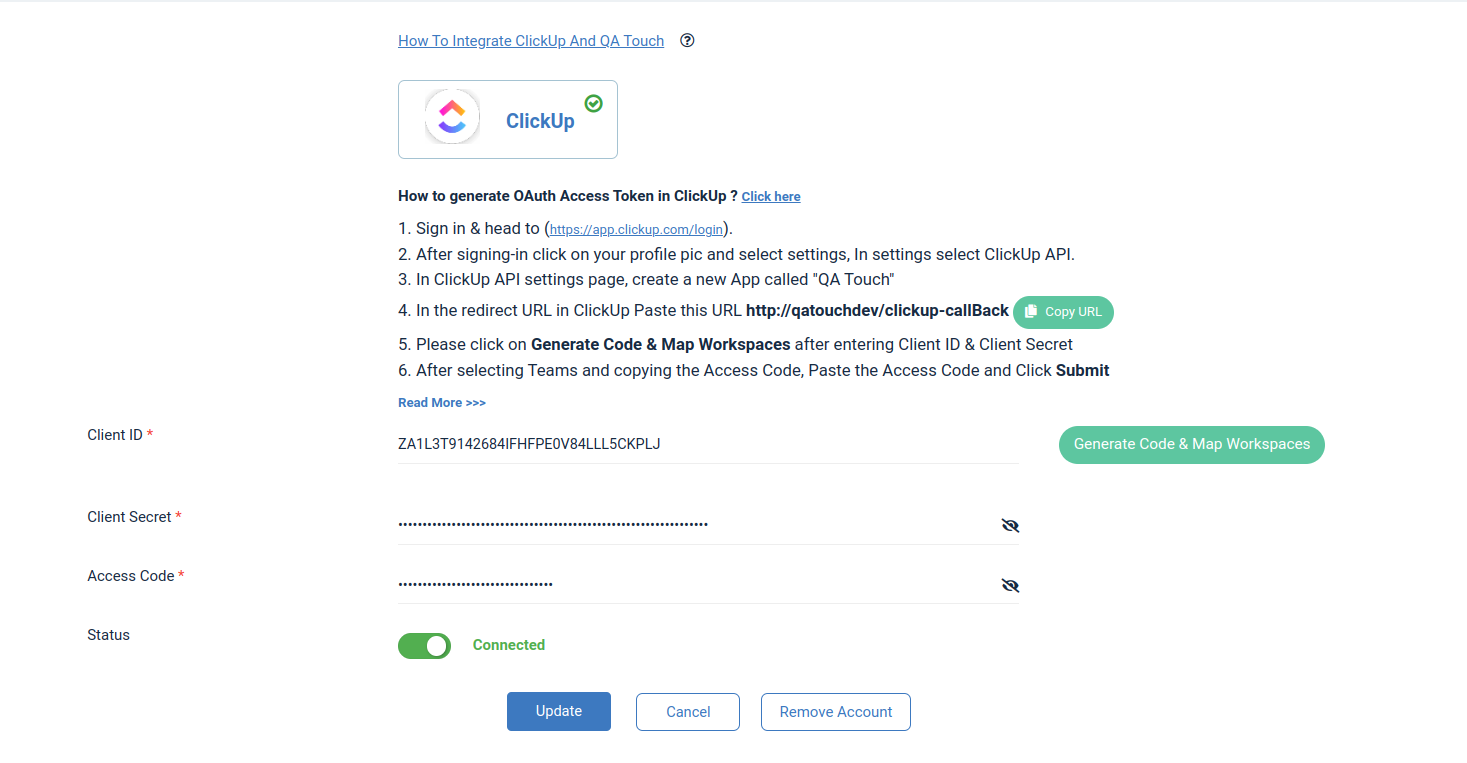
- Enter Click ID,Client Secret and Access Code.
- Click Submit.
- After successful configuration, the status becomes connected as shown in the below snapshot. The ClickUp has been successfully connected to QATouch
Mapping ClickUp to Project
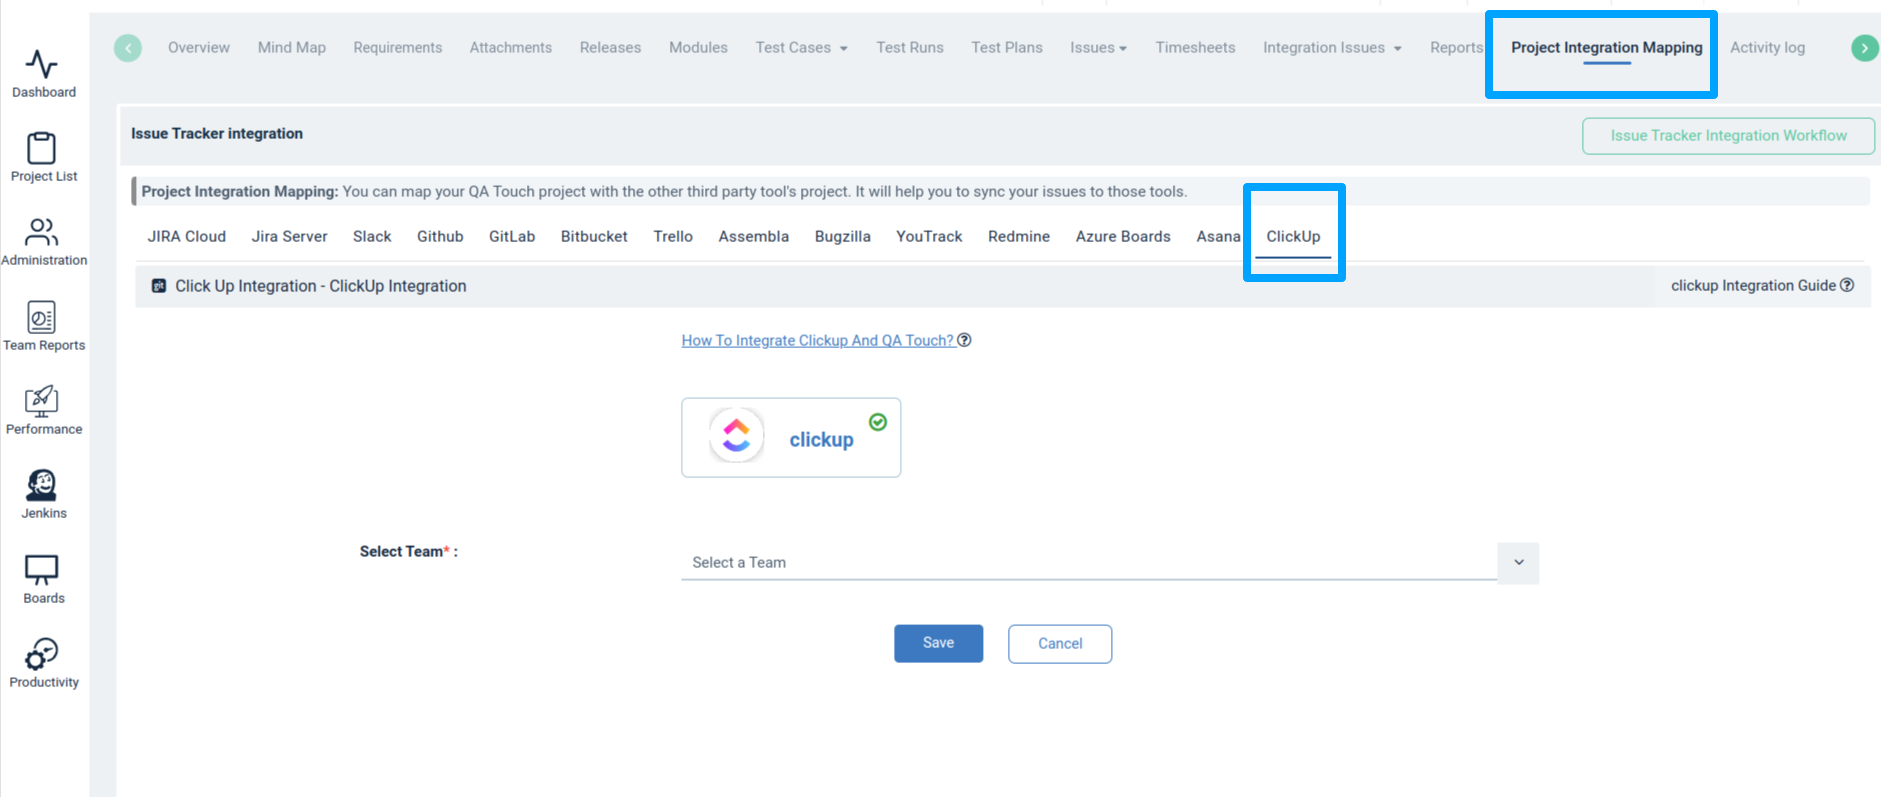
Map the respective repository to the QA touch Project with bugs which are added in the repository. Click on ClickUp Tab and Select a particular team which has access to specific workspaces in your ClickUp account.
- Click on Projects → Project Integration Mapping.
- Select a ClickUp Workspace and click submit to Map
Have a look at the below screenshot for your reference.
Posting Issue in QA Touch
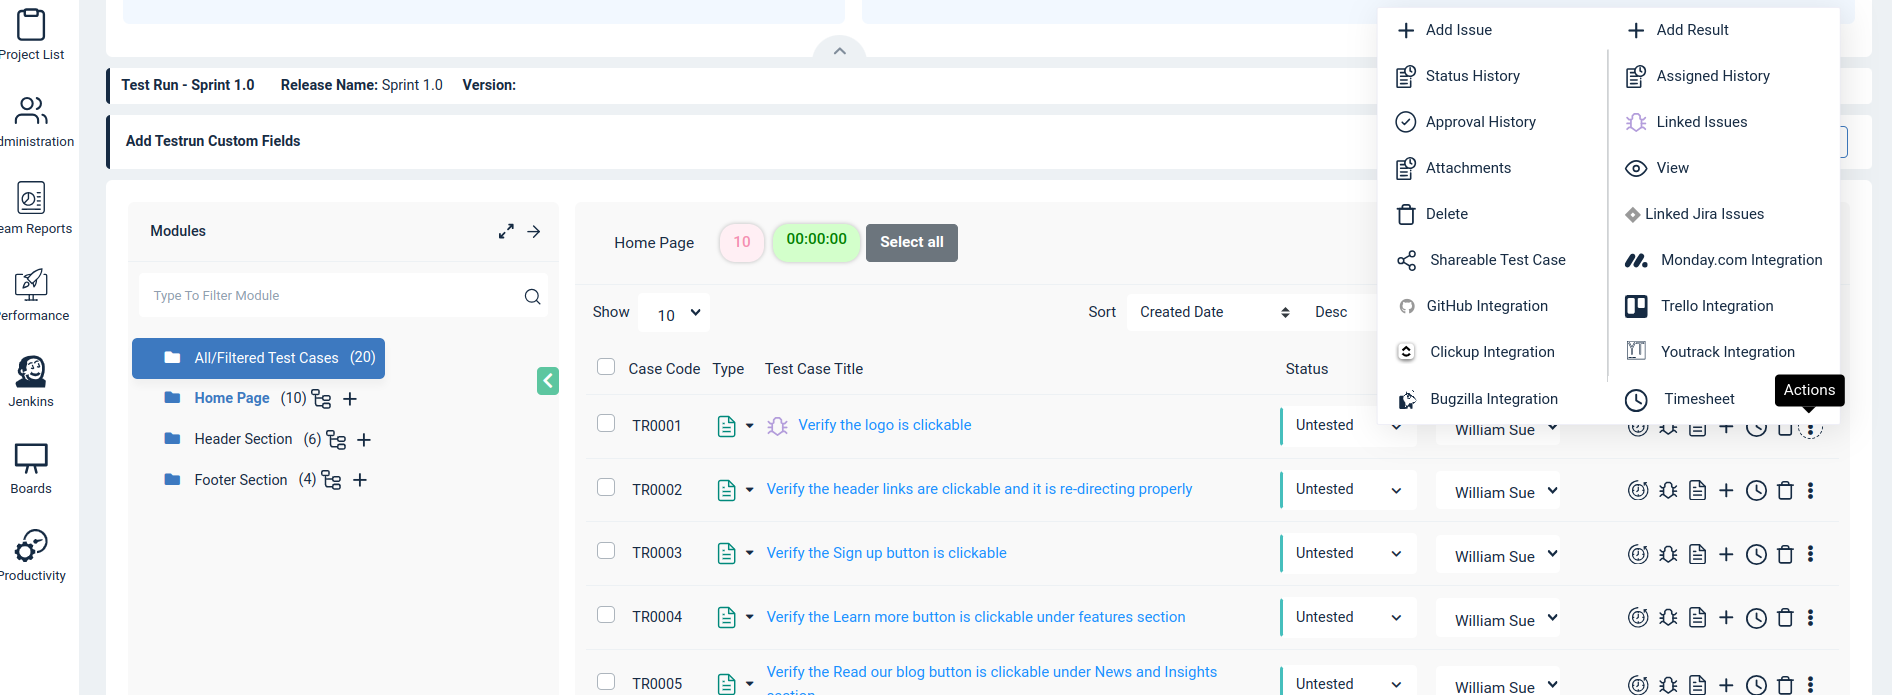
Go to any test run & result page, click the Add Issue button.
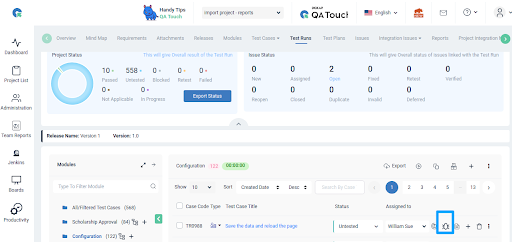
Click On Add Issue to a new Click Up Task and an QA Touch Issue simultaneously
Note: ClickUp Space, List and Status are mandatory fields to create a task.
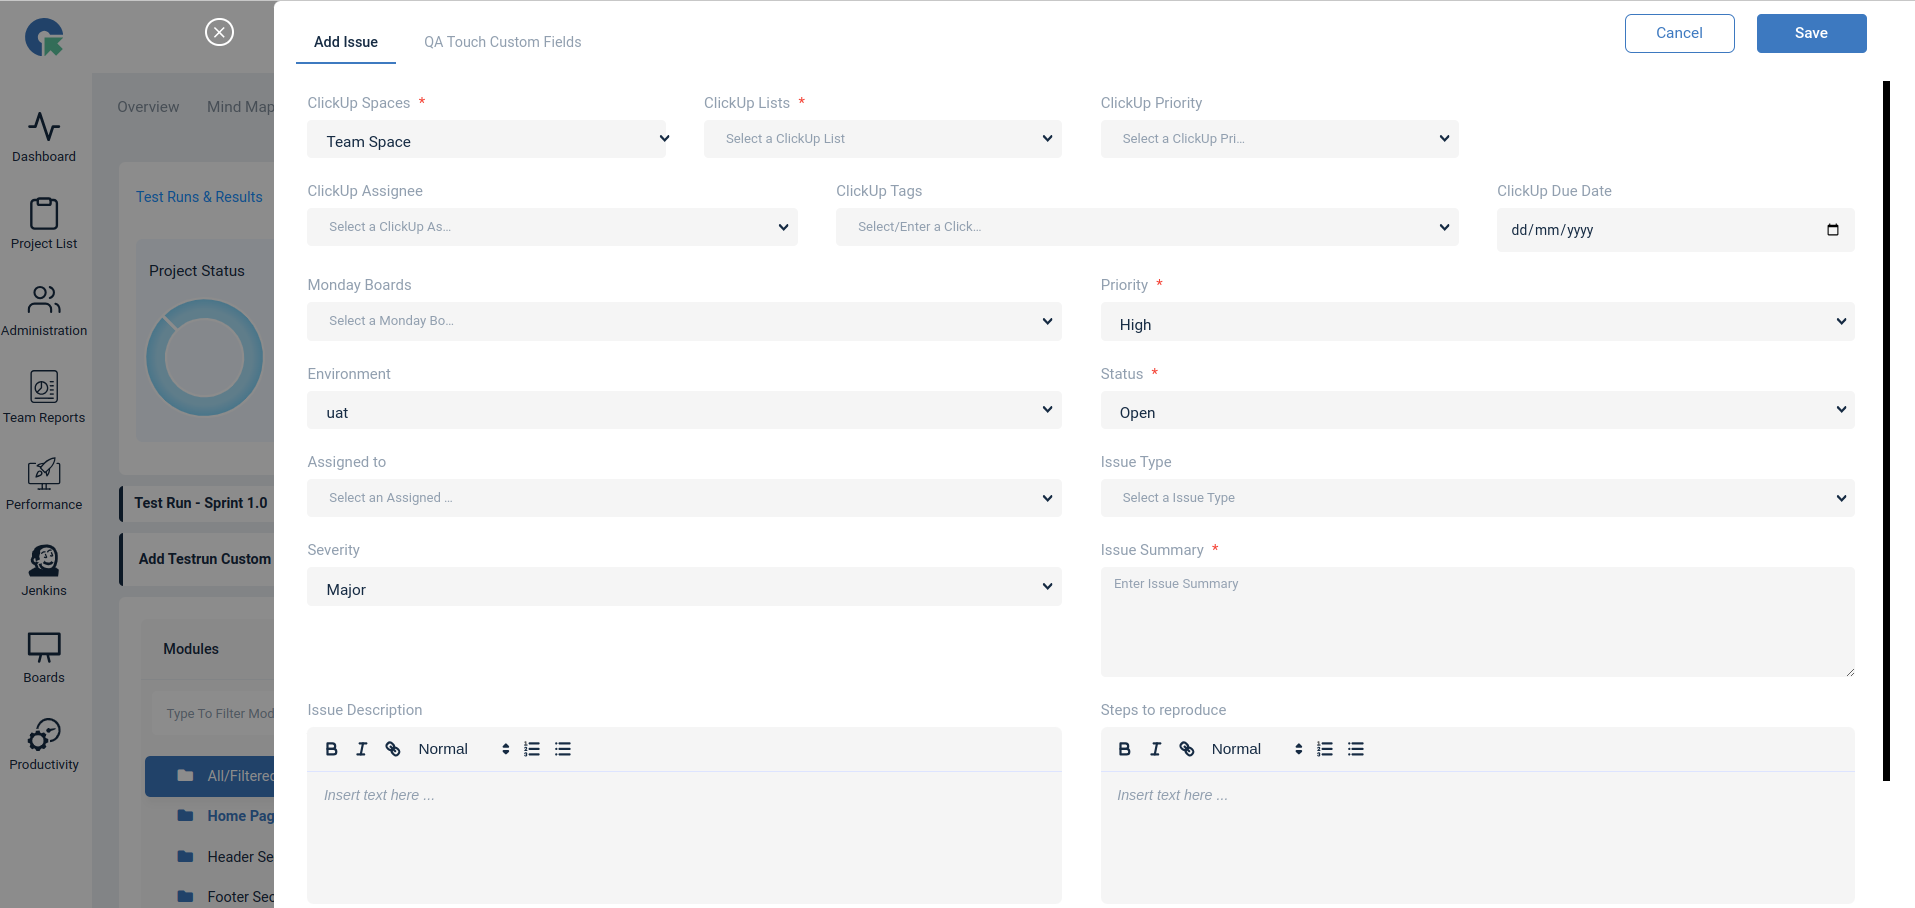
 Select a ClickUp status accordingly, along with ClickUp assignees, tags, and due date if needed.
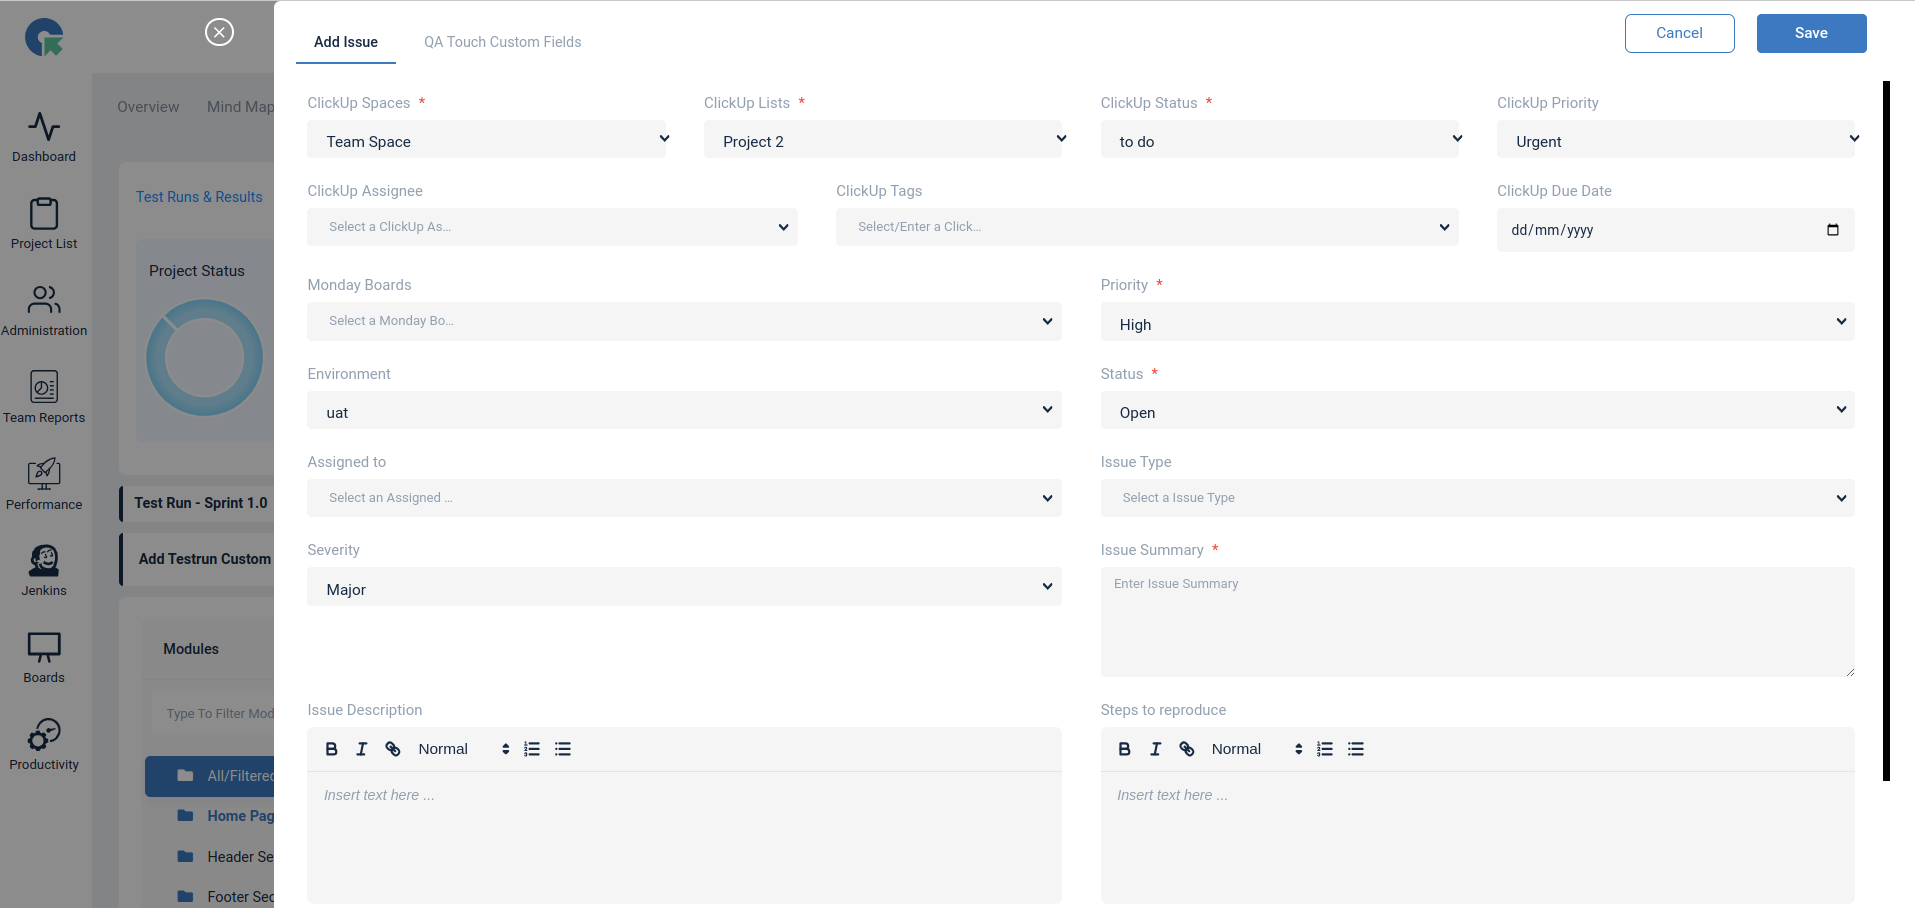
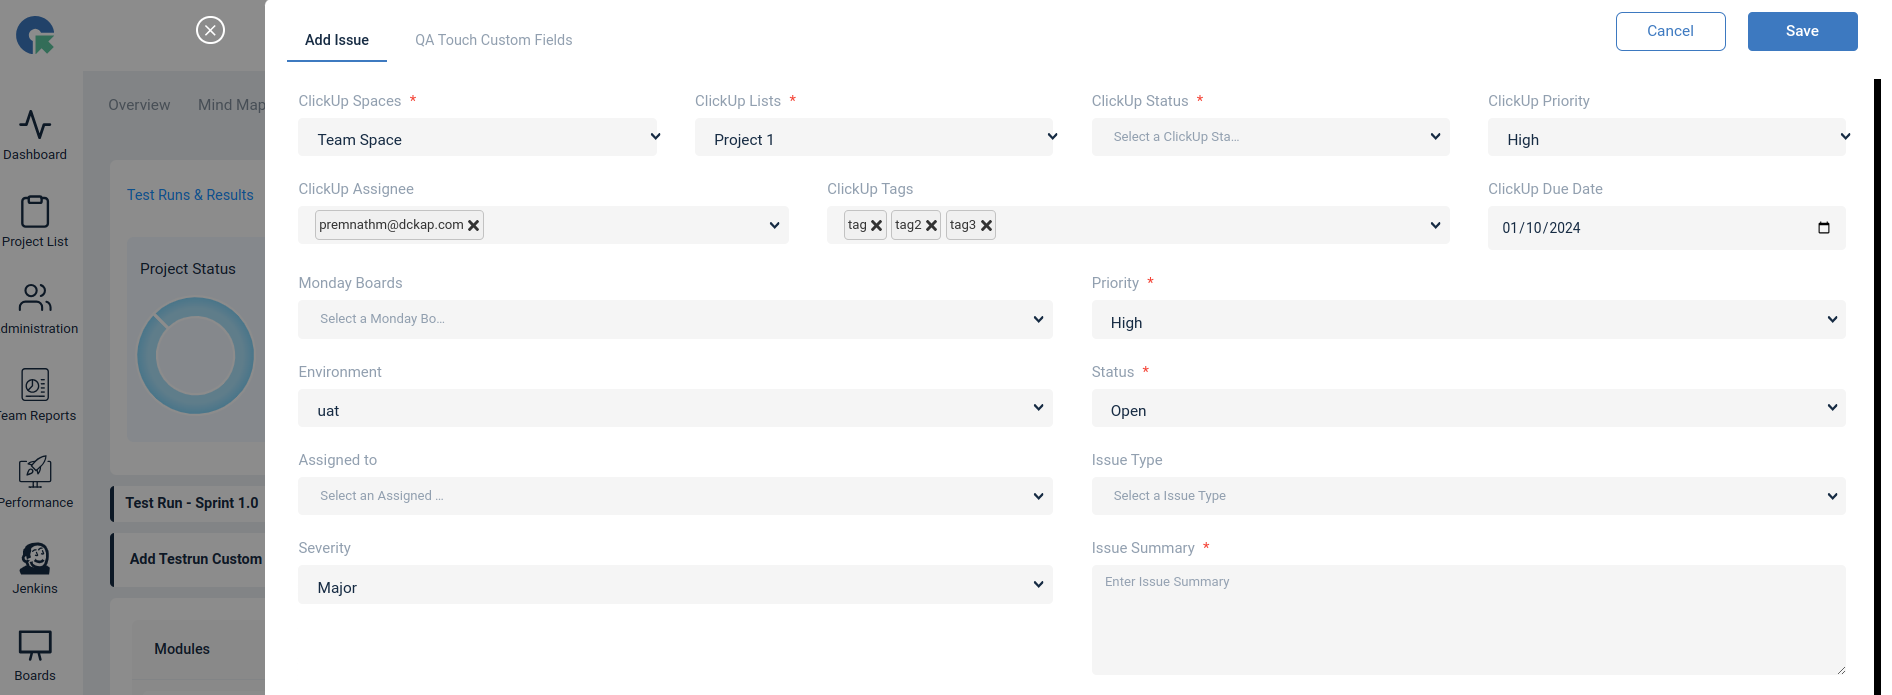
Note : Assignees, Tags can be multiple selected
New Tags can be added in the dropdown section and will automatically be added in click up workspace also. Attachment can also be added with the Issue which will also reflect in Task. The following file formats are supported: png, JPG, jpg, jpeg, gif, xls, xlsx, doc, docx, txt, pdf, csv, ppt, pptx, zip, mp4, webm, mov.
Snapshot of Messages Posted in ClickUp by QA Touch
 A screengrab of the same is shared below on how messages are posted in ClickUp by QA Touch.
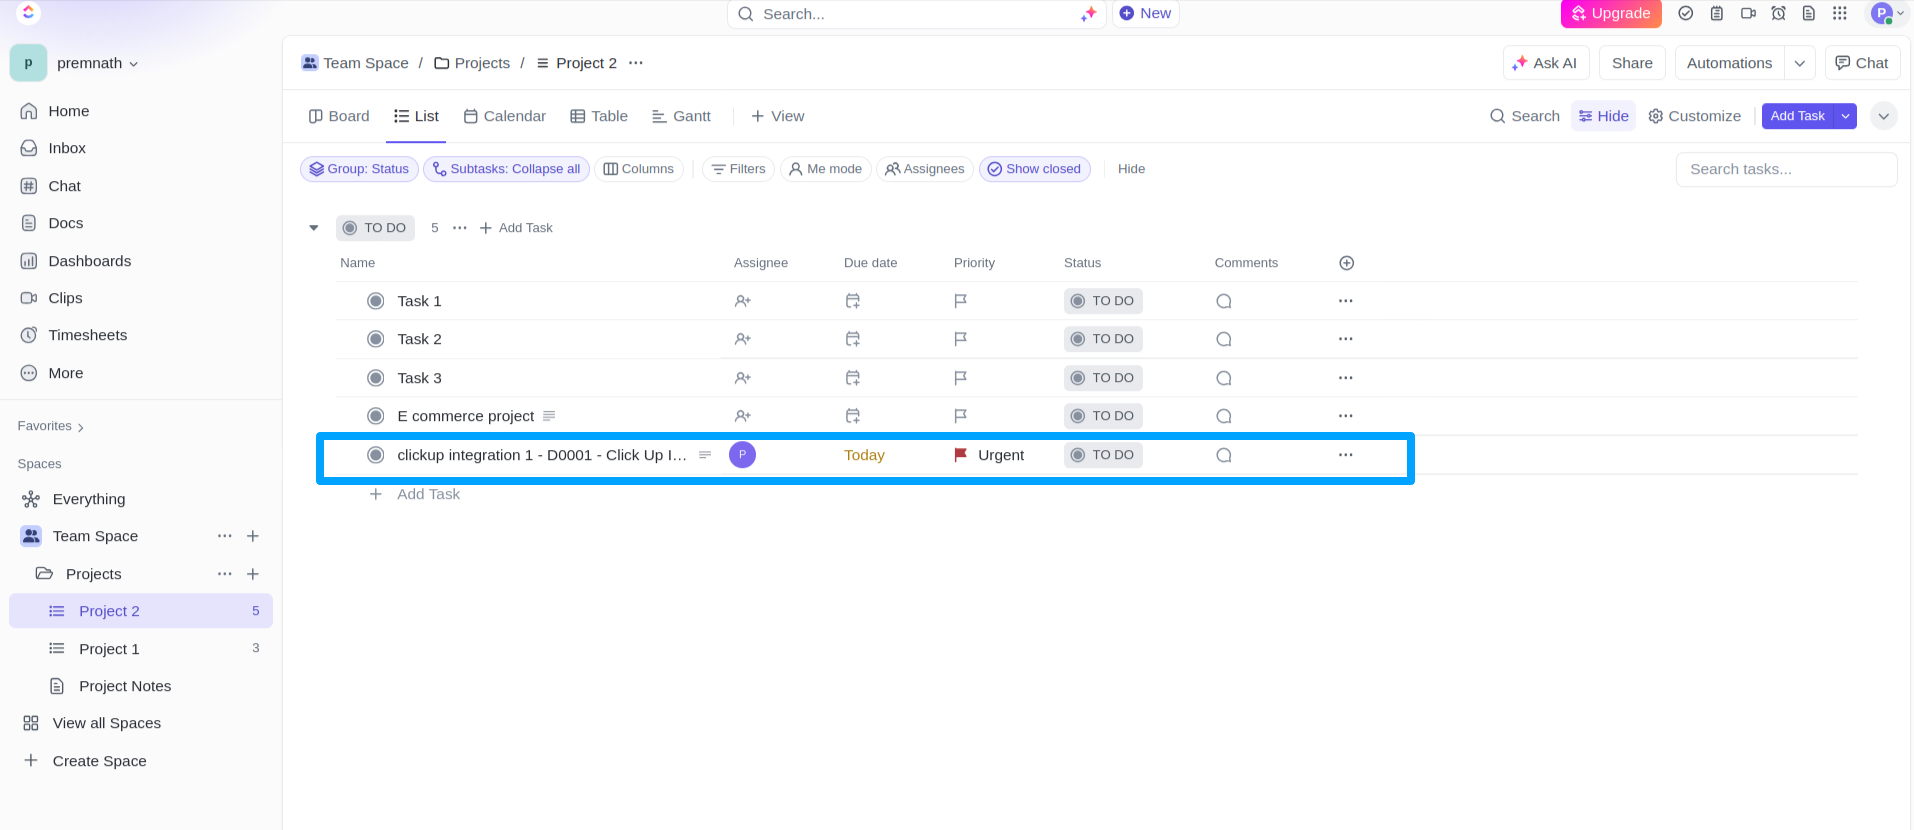
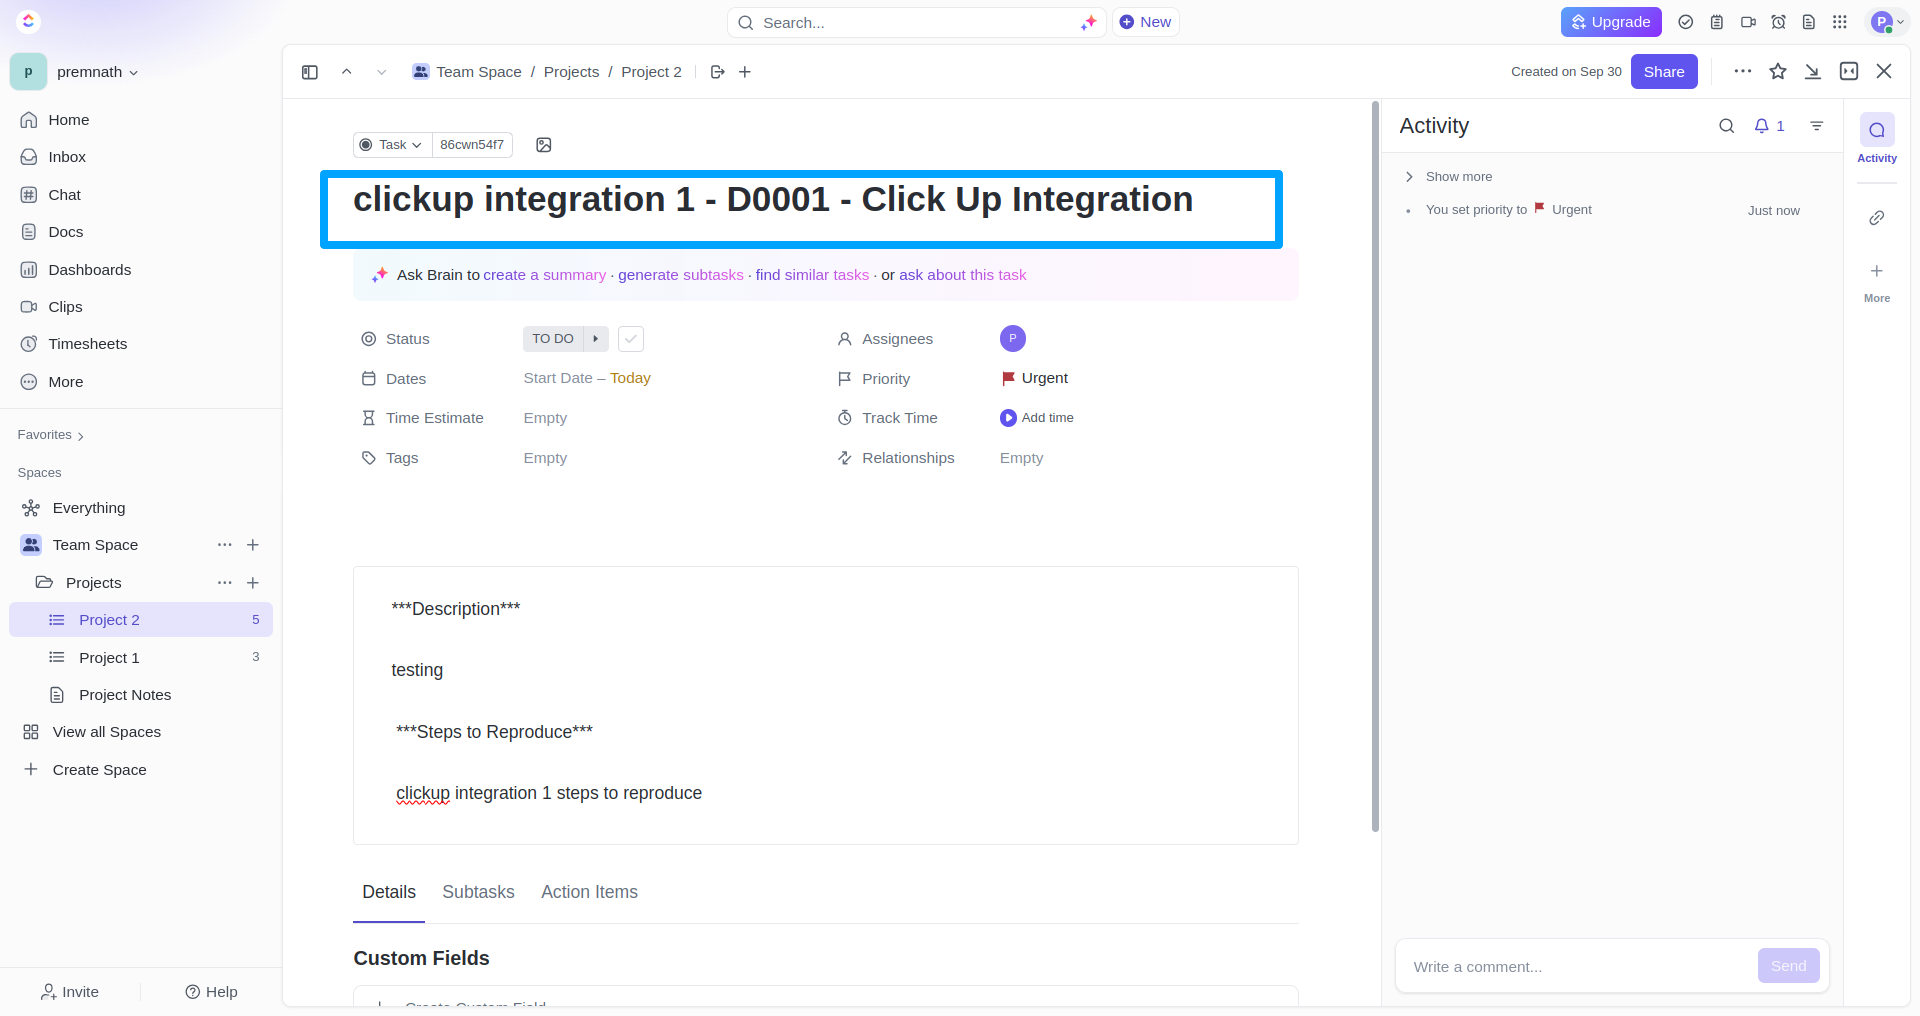
Task and Issue created successfully
View/Link/Unlink Existing Task from QA Touch (Test results)
Select a desired Test result & click on action Icon with “⋮” and select Click Integration.
Linked ClickUp Tasks
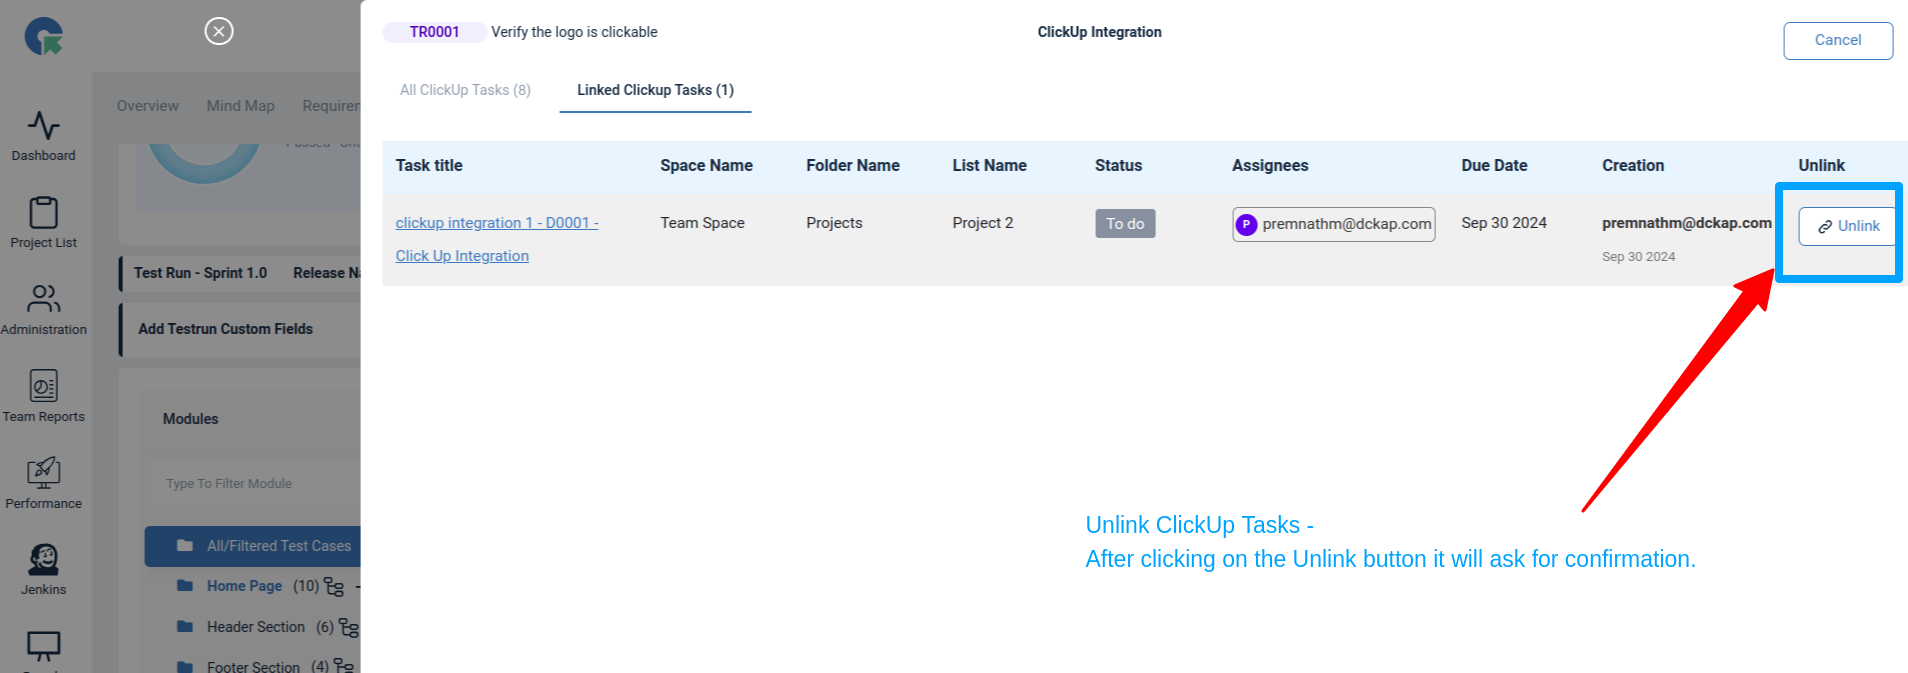 Linked Existing ClickUp Tasks
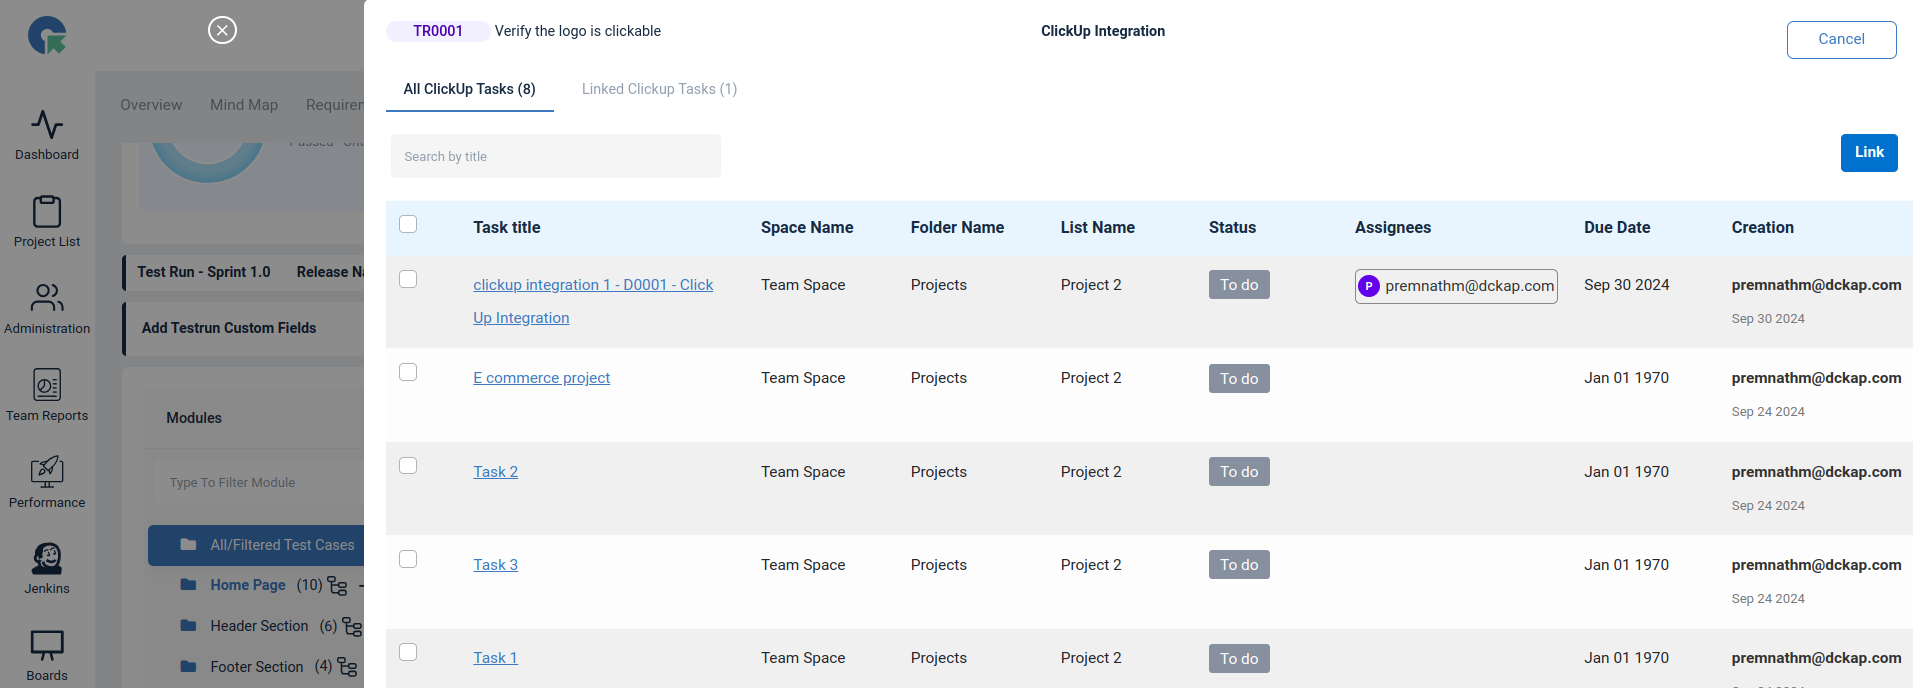 Select check boxes of the tasks which you need to link with this QA Touch Result
We hope this article helped you understand the process of how integration should be done between ClickUp Integration and QA Touch.
This integration is just the beginning of a lot more platforms with which we plan to collaborate in the near future to make testing accessible for all.
Start your 14-day free trial and be the master of your application testing.